
Outdoor solar lamps have become a practical lighting solution for homes, gardens, pathways, driveways, balconies, and security areas because they eliminate the need for complicated wiring. Whether upgrading outdoor spaces or looking for energy-efficient lighting, solar lamps offer a clean and modern alternative that works entirely on sunlight. Despite the growing popularity, many users still assume installation is difficult. In reality, installing outdoor solar lamps without wiring is simple, fast, and safe—even for beginners. This guide explains how to install outdoor solar lamps without wiring, while also addressing placement, setup, and common mistakes to avoid for the best long-term performance.
- Step 1: Choose the Right Type of Solar Lamp
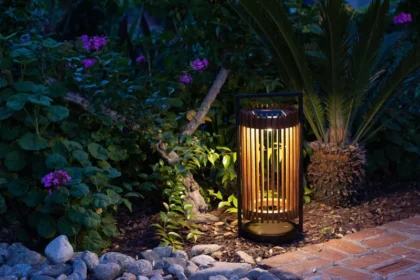
- Step 2: Identify a Location with Adequate Sunlight
- Step 3: Mount or Position the Lamp Properly
- Step 4: Angle the Solar Panel for Maximum Efficiency
- Step 5: Allow Charging Before First Use
- Step 6: Automatic Operation and Night-Time Performance
- Common Mistakes to Avoid During Installation
- Maintenance After Installation
- Final Verdict
Solar lighting is designed to be plug-and-play. Every lamp includes its own solar panel, battery storage, LED lighting component, and automatic dusk-to-dawn sensor. With no external power source required, solar lamps operate independently and switch on automatically at night. This means outdoor areas can be illuminated even in spaces where electrical lines do not exist or where wiring would be expensive and unsafe. For homeowners, renters, and commercial property managers, solar lamps remove the need for electricians, drilling permits, conduit trenches, or monthly electricity bills.
Step 1: Choose the Right Type of Solar Lamp
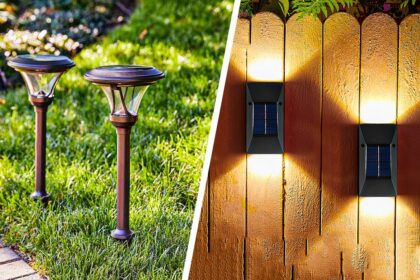
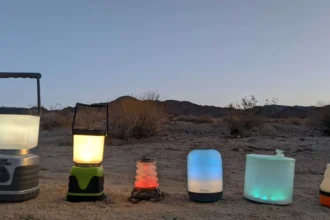
Before installing, it is necessary to identify the correct category of lamp based on the outdoor area. Solar lighting is not one-size-fits-all. Driveways benefit from wall-mounted motion lights or bollards, gardens use pathway stake lights, terraces use lanterns or string lights, and parking areas may require solar flood lights. Selecting the wrong category may lead to poor brightness or improper coverage. By matching lamp type with the intended location, installation becomes purposeful and results are more satisfying.
Step 2: Identify a Location with Adequate Sunlight
The most important factor in installing outdoor solar lamps without wiring is sunlight exposure. Solar panels need direct sunlight for efficient charging. Placing the lamp panel under shade, trees, roofs, or behind walls will reduce performance. Ideally, panels should receive at least four to six hours of sunlight daily for evening runtime. South-facing exposure is usually best in most regions. For balconies, it may be necessary to position external solar panels at the edge of the railing or on a wall hook where sunlight is strongest. For terraces, direct sky exposure makes installation easier and more effective.
Step 3: Mount or Position the Lamp Properly
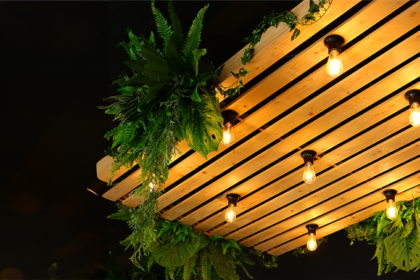
Installation depends on lamp design. Wall-mounted solar lamps are installed by drilling small holes into exterior walls, gate posts, garage walls, or boundary walls. Most models include mounting brackets, screws, and simple instructions. Post and bollard lamps are placed directly into soil or mounted on fixed poles. Pathway stakes push into garden soil along pathways and driveways. Portable lanterns and table lamps require no installation and can be placed directly on surfaces. String lights are hung using clips along railings, pergolas, or balcony edges. Because no wiring is involved, installation time is usually under ten minutes for most lamp types.
Step 4: Angle the Solar Panel for Maximum Efficiency
The angle of the solar panel influences how much sunlight it can absorb. Panels should face the direction of maximum sun exposure and be tilted slightly to allow water drainage during rain. Many solar wall lamps have fixed-panel angles already optimized for outdoor use. Adjustable units let you reposition panels seasonally for better absorption. For installations in monsoon-prone regions, keeping panels slightly sloped prevents water stagnation and improves longevity. Ensuring a clear sky view above the panel, free from obstructions like tall plants or balcony shades, enhances charging efficiency significantly.
Step 5: Allow Charging Before First Use
After installation, outdoor solar lamps should be left to charge for several hours before first use. Some models include a power switch under the panel that needs to be turned on after charging. Allowing the lamp to charge under sunlight ensures the internal battery reaches sufficient capacity to run through the night. During rainy seasons or winter months, charging may be slower, so lamps with larger panels and lithium batteries offer better performance. Understanding battery behavior is important because initial charging sets performance expectations for long-term use.
Step 6: Automatic Operation and Night-Time Performance
Most modern outdoor solar lamps include dusk-to-dawn sensors that turn the lamp on at night and off at sunrise automatically. Motion sensor models increase brightness when movement is detected, saving battery energy during inactive hours. During installation, ensure the sensor is not blocked by objects that could affect detection. Once installed, the lamp works independently without requiring manual operation or external power sources. This makes solar lighting ideal for gardens, parking areas, terraces, and rural environments where electricity access may be limited or unreliable.
Common Mistakes to Avoid During Installation
New users often make simple mistakes that reduce performance. The most common mistake is installing lamps in shaded areas where panels cannot charge properly. Another mistake is placing lamps too close to artificial light sources, such as porch bulbs or streetlights, which can interfere with dusk sensors. Installing lamps on extremely low or uneven surfaces may reduce coverage and visibility. Using incorrect lamp types for functional zones also leads to dissatisfaction—decorative lights should not be used for driveways or security pathways where brightness matters.
Maintenance After Installation
Although installation requires no wiring or electrical maintenance, basic care improves performance. Cleaning the solar panel every two to three weeks with a soft cloth removes dust and improves charging efficiency. Checking screws and mounts after storms ensures stability. For gardens, clearing leaves or plant growth around stake lights prevents shade and maintains brightness. High-quality models require little upkeep, but even low-maintenance units benefit from periodic cleaning.
Final Verdict
Learning how to install outdoor solar lamps without wiring is straightforward and empowering for homeowners and outdoor enthusiasts. With no electrician required, no wiring hazards, and no ongoing electricity cost, solar lighting offers a modern approach to outdoor illumination. By choosing the right lamp type, ensuring proper sunlight exposure, positioning the panel correctly, and avoiding common installation mistakes, users can enjoy consistent night-time lighting throughout the year. As solar technology continues to improve, installation becomes even easier, making solar lamps one of the most convenient upgrades for outdoor comfort, safety, and ambiance.