
Solar street lighting has become a key component of modern infrastructure, widely used in residential societies, rural village roads, commercial campuses, industrial parks, and municipal development projects. With zero grid dependency and lower long-term costs, solar street lighting offers a practical alternative to conventional wired street lighting. However, many installers, contractors, and buyers still hesitate because they believe the setup process is complex. In reality, the installation guide for solar street lights is simple and straightforward when the equipment is properly matched to the location and mounting requirements. Understanding each step ensures correct installation, safe operation, and long-term performance.
- Step 1: Choosing the Right Installation Location
- Step 2: Preparing the Pole Foundation
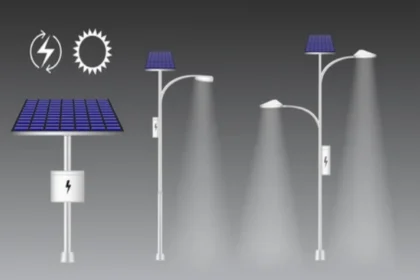
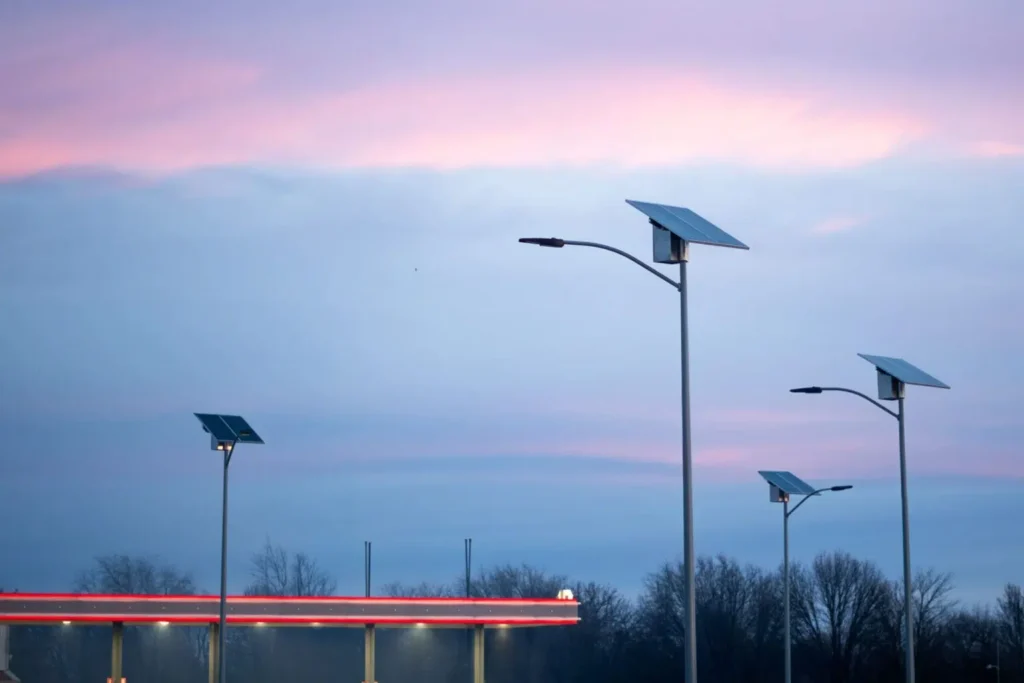
- Step 3: Mounting the Pole and Bracket
- Step 4: Solar Panel Orientation & Tilt Angle
- Step 5: Connecting the Battery & LED Light (If Required)
- Step 6: System Activation & Testing
- Maintenance After Installation
- Final Verdict
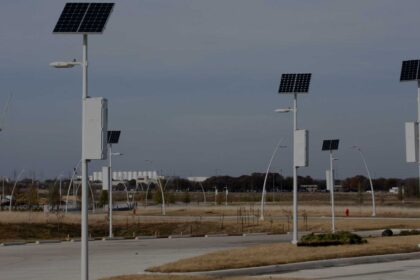
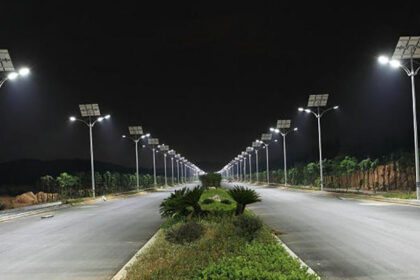
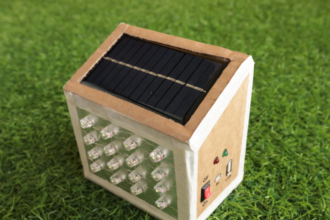
Solar street lights operate independently because they incorporate a solar panel, battery, LED lamp, and intelligent controller into a unified system. Unlike wired street lights, they do not require underground cabling, transformers, junction boxes, or power supply connections. This drastically reduces installation costs and makes deployment faster—especially in areas with no existing electrical infrastructure. When installed correctly, solar street lights operate automatically from dusk to dawn, providing night-time illumination without manual effort. The setup process involves selecting the right location, preparing a pole, mounting the light unit, orienting the solar panel, and performing initial system checks.
Step 1: Choosing the Right Installation Location
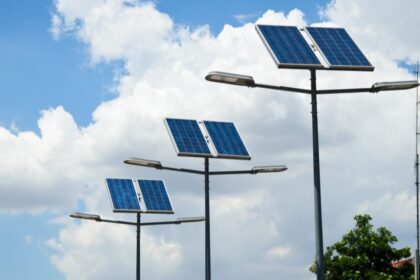
Location is the most important factor in solar street lighting installation. The solar panel needs maximum exposure to direct sunlight to charge the battery effectively. Therefore, the selected spot must be free from shade caused by trees, buildings, or electric poles. South-facing orientation is ideal in most regions because it receives the most consistent sunlight throughout the year. For rural roads, housing societies, and campuses, locating poles along clear roadway shoulders ensures reliable charging and unobstructed illumination. The chosen site should also have sufficient space for pole foundation work without disrupting traffic or pedestrians.
Step 2: Preparing the Pole Foundation
Once the installation spot is selected, the pole foundation work begins. Although solar street lights do not require electrical trenches, they still need sturdy foundation anchoring to withstand wind and weather. Foundation depth and size depend on pole height, soil type, and environmental conditions. For standard 5–8 meter poles used in societies and campuses, a concrete foundation with anchor bolts is commonly used. For taller poles (8–10+ meters) used on highways or industrial layouts, deeper reinforced foundations ensure structural stability. Proper curing time for concrete increases load-bearing strength and prevents pole movement after installation.
Step 3: Mounting the Pole and Bracket
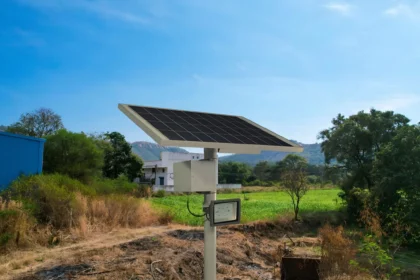
After the foundation is ready, the pole is installed by positioning it over anchor bolts and tightening base nuts. The LED light unit and mounting bracket are then positioned according to design specifications. Brackets vary based on the model type—All-in-One solar street lights include integrated brackets, while All-in-Two models require separate mounting for the solar panel and lamp. For flood-style solar street lights using external panels, adjustable brackets allow fine positioning to maximize sunlight exposure throughout the year. Ensuring proper torque on bolts prevents vibration or misalignment during storms or heavy wind.
Step 4: Solar Panel Orientation & Tilt Angle
One of the most important parts of the installation guide for solar street lights is panel orientation. Solar panels must be angled to capture maximum sunlight. The ideal tilt angle varies by region but generally ranges between 20° and 45° to optimize absorption. Panels should face true south in the Northern Hemisphere for best year-round performance. In areas with frequent dust, pollution, or bird droppings, placing the panel at a slight tilt also helps rainwater wash away dirt naturally. Adjustable mounts are useful because they allow seasonal adjustments to improve charging efficiency during winter months when sunlight intensity decreases.
Step 5: Connecting the Battery & LED Light (If Required)
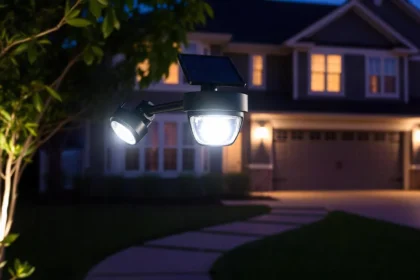
Integrated solar street lights come pre-wired from the factory, meaning no electrical connection work is needed at the installation site. For semi-integrated or all-in-two systems, installers must connect the solar panel to the battery and the battery to the LED light using provided connectors. Smart MPPT charge controllers regulate power flow and protect the battery from overcharging or deep discharge. These components are usually pre-configured but should be checked for secure connections and correct polarity before powering on. Cable routing must be neat and weatherproofed using rubber grommets or conduit to prevent damage from wind or rain.
Step 6: System Activation & Testing
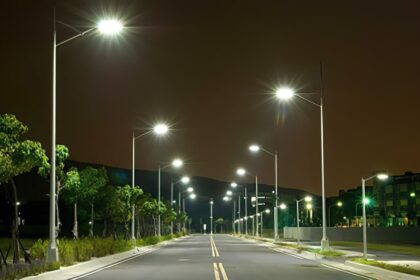
After mounting and wiring, the system needs to be tested. Most solar street lights include an on/off or auto mode switch located inside the battery box or beneath the panel. The system should be switched to “Auto” mode to allow dusk-to-dawn operation. During testing, installers may cover the solar panel briefly to simulate nighttime conditions and verify LED operation. Brightness modes and motion sensor settings (if available) should be checked for correct functionality. Battery voltage and panel output can be measured using a multimeter for technical verification in commercial or government projects.
Maintenance After Installation
Solar street lights require minimal maintenance compared to wired alternatives, but a few preventive measures extend lifespan and ensure consistent brightness. Cleaning the solar panel surface every 1–2 months removes dust and improves charging efficiency—especially in dry, dusty regions. Checking mounting bolts and pole alignment after heavy storms prevents structural issues. Battery replacement may be necessary every 3–7 years depending on battery type and usage. With LiFePO4 batteries becoming standard in 2026, replacement cycles are longer, and performance is more stable even in high-temperature regions.
Final Verdict
This installation guide for solar street lights highlights how simple, efficient, and cost-effective solar lighting deployment has become. By choosing a proper location, preparing a solid pole foundation, orienting the solar panel correctly, and conducting proper system testing, solar street lights can be installed quickly with long-term reliability. Because they require no cabling, transformers, or electrical connections, solar street lights significantly reduce installation costs while delivering sustainable illumination from dusk to dawn. As solar technology continues to advance, ease of installation combined with low maintenance makes solar street lights an attractive solution for smart cities, rural development, residential societies, industrial parks, and commercial projects.